

Maintaining your vehicle’s braking system is essential for safety. Over time, disc brake pads wear out and need replacement to ensure your car stops effectively.
Replacing disc brake pads might seem intimidating, but with the right tools and knowledge, it can be a straightforward process.
This guide will walk you through the steps to replace disc brake pads and help you keep your car in excellent condition.
Why Replace Disc Brake Pads?
Disc brake pads are crucial components in your car’s braking system. They press against the brake rotor, creating the friction needed to slow down your car.
Over time, this friction wears down the pads. If the pads become too thin, your braking performance can suffer, and the metal backing can damage the rotor, leading to costly repairs.
Common signs that your brake pads need replacement include:
- A high-pitched squealing or grinding noise when braking.
- Reduced braking performance.
- A warning light on your dashboard (if equipped).
- Visual inspection showing thin or worn-out pads.
Tools and Materials You’ll Need
Before starting, gather the following tools and materials:
- New disc brake pads (ensure they are the correct type for your vehicle).
- Car jack and jack stands.
- Lug wrench.
- C-clamp or brake caliper tool.
- Socket set or wrench.
- Brake grease or anti-seize lubricant.
- Work gloves and safety goggles.
- Owner’s manual for reference.
Step-by-Step Guide to Replacing Disc Brake Pads
1. Prepare Your Vehicle
Start by parking your car on a flat surface and engaging the parking brake. Place wheel chocks behind the rear tires for added safety. Refer to your vehicle’s owner’s manual to confirm you have the correct replacement pads.
2. Lift the Vehicle
Use the lug wrench to loosen the lug nuts on the wheel you’ll be working on. Then, use a car jack to lift the vehicle and place jack stands underneath for stability. Fully remove the lug nuts and take off the wheel to access the brake assembly.
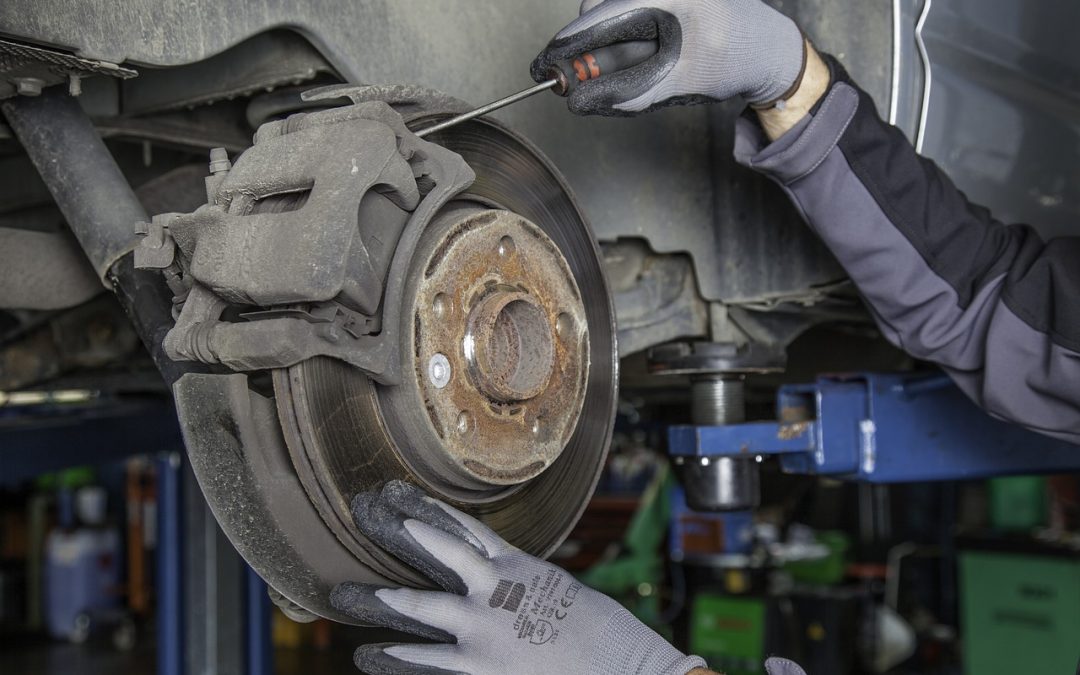
3. Remove the Brake Caliper
Locate the brake caliper, which houses the brake pads. Use a socket set or wrench to remove the bolts holding the caliper in place. Carefully slide the caliper off the rotor. Avoid letting the caliper dangle by the brake hose; use a bungee cord or wire to hang it securely.
4. Remove the Old Brake Pads
Pull the old brake pads out of the caliper bracket. Take note of how they are positioned so you can install the new ones correctly. Inspect the caliper and bracket for signs of damage or excessive wear.
5. Compress the Caliper Piston
The caliper piston needs to be compressed to make room for the new, thicker brake pads. Place the old brake pad against the piston and use a C-clamp or brake caliper tool to slowly push the piston back into the caliper. This step ensures the new pads will fit properly.
6. Install the New Brake Pads
Apply a small amount of brake grease or anti-seize lubricant to the back of the new brake pads. This helps prevent noise and ensures smooth operation. Slide the new pads into the caliper bracket, ensuring they fit snugly in place.
7. Reinstall the Brake Caliper
Carefully position the caliper over the new pads and rotor. Reattach the caliper bolts and tighten them securely using the appropriate torque specifications from your owner’s manual.
8. Reinstall the Wheel
Put the wheel back onto the hub and hand-tighten the lug nuts. Lower the vehicle off the jack stands and use the lug wrench to fully tighten the lug nuts in a crisscross pattern. This ensures even pressure on the wheel.
9. Test Your Brakes
Before driving, press the brake pedal several times to ensure the caliper piston and brake pads are correctly seated. The pedal should feel firm, not spongy. If everything feels normal, take the car for a short, low-speed test drive to ensure the brakes work properly.
Pro Tips for Success
- Check Both Sides: Always replace brake pads on both sides of an axle to ensure even braking.
- Inspect the Rotors: If your rotors are grooved, warped, or excessively worn, consider replacing or resurfacing them during the brake pad replacement.
- Don’t Rush: Take your time to ensure each step is done correctly. Hasty work can lead to mistakes and unsafe brakes.
- Dispose Properly: Dispose of the old brake pads and any other materials responsibly at a local recycling or auto parts store.
When to Seek Professional Help
If you encounter problems such as stuck caliper bolts, difficulty compressing the piston, or excessive rust, it might be time to consult a professional mechanic. Additionally, if you’re uncomfortable performing the replacement yourself, don’t hesitate to have a professional handle it for you.
Final Thoughts
Replacing disc brake pads is a valuable skill that saves you money and ensures your car’s safety. With the right tools, patience, and this guide, you can confidently tackle the task and enjoy the satisfaction of maintaining your vehicle. Remember, properly functioning brakes are critical, so never compromise on their quality or performance.